 Skip to content
Screen Printing Squeegee Tips and Information
The squeegee is one of the most important parts of a screen printing system. It's the part that pushes ink through the mesh screen and onto your product. It may seem like a simple action, however there are many factors to consider to ensure your print turns out exactly how you expect it to. If the squeegee is the wrong durometer, wrong shape, dirty or dull, then you will have a very difficult time producing a crisp print. Below we explain all of these considerations and more, to help you understand all there is to know about the importance of the squeegee in the screen printing process.
Squeegee Durometer
Durometer measures the hardness. 60, 70, and 80 durometer are the most common squeegee ratings available.
The big question is what kind of durometer squeegee you will need for your particular application.
- The 60 durometer squeegee is typically used for screens that have lower mesh counts (25-85). The squeegee is for printing on irregular surfaces. A 60 durometer will push more ink through (ideal for puff or jell inks).
- The 70 durometer squeegee is the most common in the industry. It works on mesh counts from 305-355.
- The 80 durometer can produce finer detail. This durometer squeegee is ideal for the 4 color process, intricate multicolor images or halftones.
Squeegee Shapes
- Beveled: Angles are on both sides of the squeegee making the shape look triangular. They are typically used with uneven surfaces on products.
- Straight: The blade is flat, this is the most common shape for screen printing.
- Round: Ideal for heavy deposits of ink.
Squeegee Material
Polyurethane: The most popular material used for squeegees on the market (second is Neoprene). It is the most resistant to wear and distortion from solvents.
Squeegee Maintenance
Turn the squeegee around if you see it is becoming dull. Do not sharpen the squeegee with a grinder as that will introduce heat which will distort your squeegee material. You also do not want to let the squeegee sit with UV ink on the blade (or any solvent). It will cause distortion of the squeegee material. Always keep the squeegee blades clean. It is ideal to have more than one available so if one blade is cleaned and wet, you can rotate to a dry blade.
Squeegee Size
You want the length of your squeegee to be close to the width of the image you are printing. This is because the more squeegee to screen contact, the more wear on your screen. The general rule of thumb is having the squeegee 1/2” larger than your image on each side.
Screen Printing Squeegee and Your Machine
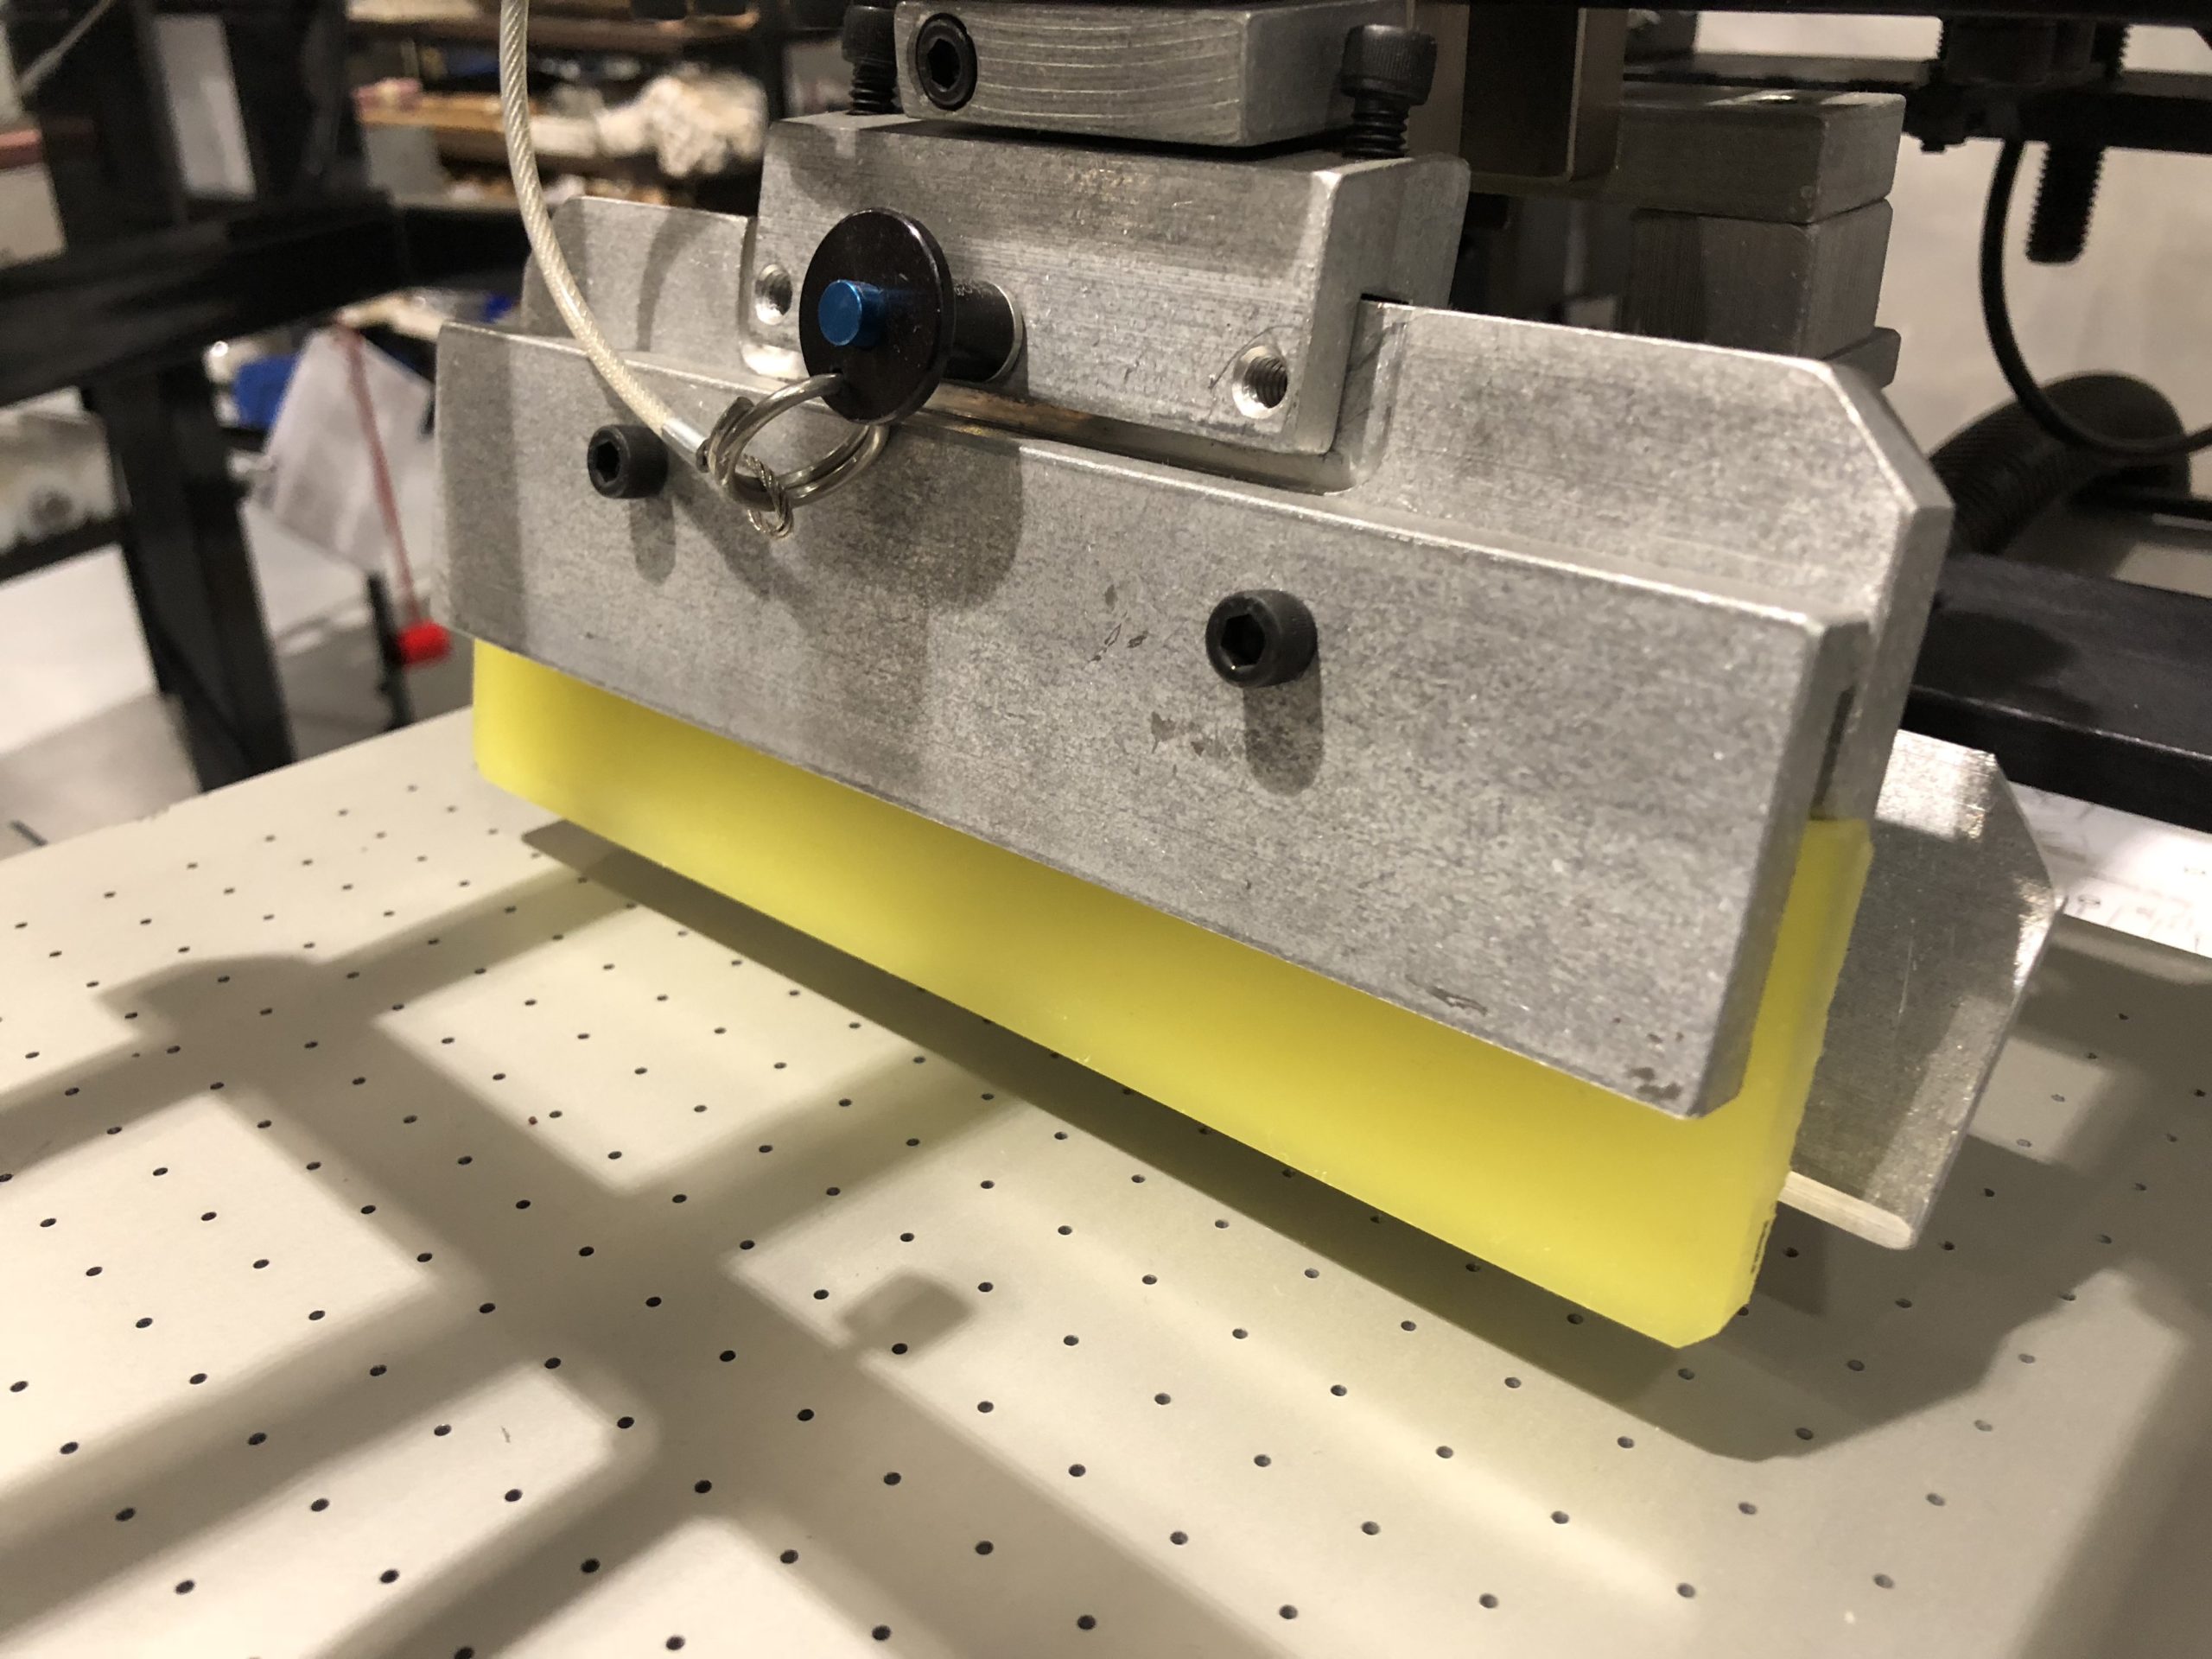
- The print head assembly incorporates a squeegee assembly and flood bar. Two air cylinders alternately raise and lower the squeegee and flood bar as required throughout the print cycle. Adjustment knobs at the top of each air cylinder permit precise control of this vertical motion.
- The squeegee assembly consists of two aluminum plates that clamp squeegee rubber material with two socket head cap screws. This assembly is held to the squeegee attachment bar by a quick release ball lock pin, providing a one touch change over.
- The flood bar is a beveled aluminum plate retained by two socket head cap screws to the flood bar holder. The flood bar serves to return ink to the screen image following the previous print stroke.
Adjustable Screen Printing Squeegee Down Limit
The adjustable squeegee down limit adjust knob is the mechanical stop for how far the squeegee travels downward against the screen and the substrate being printed. In almost all situations printing, it is recommended to allow the adjust knob to “bottom out” (make contact with the rubber washer below it) during the print stroke. Any slight variations in the substrate thickness or flatness will be compensated by the resiliency of the squeegee rubber.
Your printer is equipped with an adjustable squeegee pressure gauge and regulator. You can use this feature on substrates which are irregular in shape such as slightly concave or convex surfaces. To use this feature, the squeegee down limit stop must be adjusted so the squeegee cylinder is free to allow the squeegee travel down to the lowest part of the substrate.
As the squeegee travels along the part being printed during the print stroke, the squeegee will be able to rise up and drop back down progressively during the print stroke. The squeegee adjustment must be set to a minimum pressure to obtain a good print throughout the print stroke. This feature lets the squeegee holder rise and fall rather than forcing the squeegee to deflect. A deflecting squeegee will change the squeegee angle and force it against the screen and substrate. Both of these factors will compromise print quality.
Want to learn more about screen printing?
Whether you're a beginner, novice, or advanced in screen printing, there's always more to learn. That's why we created a Screen Printing 101 resource page covering some of the most important questions we're often asked. Take a look and if you have any questions or would like to learn more about our world-leading screen printing machines, don't hesitate to give us a call at (860) 677-6400.